 Jishun Sewing

Jishun Sewing always at your side
Email:jishunsewing@gmail.com Whatsapp:+8613652365086

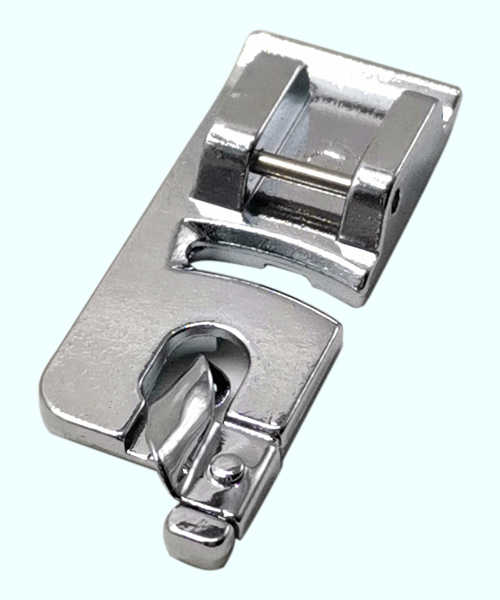
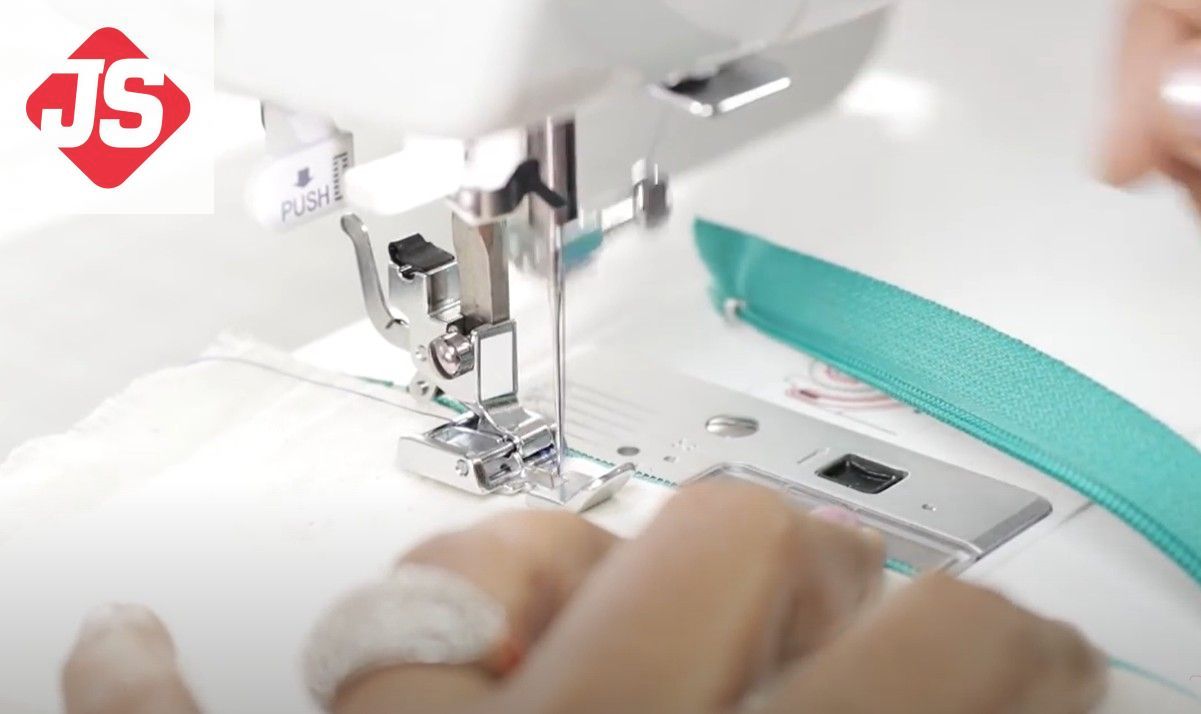
How to Use a Rolled Hem Presser Foot
Author:Kayla
Click:
Time:2024-11-17 14:26:43
How to Use a Rolled Hem Presser Foot
Using a rolled hem presser foot can give your sewing projects a neat and professional finish. Here's a step-by-step guide:
Prev : Operator’s manual forDS-9C sewing machine partsNext : What is the compensating presser foot for Juki
Your likes are the strength for me to continue writing.
YouArticle
已有0人推荐
-

JUKI LS-2342-7...
微量供油直接驱动·筒型单针平缝综合送布水平大旋梭缝纫机 (半长规格) LS-2342-7(带自动切线装置) LS-2342
-

What to do if ...
-
How to Clean a...
-
Operator’s man...
High speed sewing bag closer machine
-
How does the I...
IDL-302 1 Thread Flat Butted Seam Sewing Machine if is used in Fabric Joining ,Beautiful stitches, not easy to break, not easy to skip stitches, long service life.
-
How to Use a R...
First, it provides an introduction on the benefits of using a rolled hem presser foot. Then it goes through steps such as preparing the sewing machine by turning it off and removing the old foot, installing the new foot, adjusting settings like stitch length and thread tension. Next, it discusses preparing the fabric by cutting and pressing. After that, it details the process of sewing the rolled hem including positioning the fabric and guiding it. Finally, it mentions finishing the hem with bac
-
What is the co...
First, the function of the JUKI compensation presser foot is introduced, including maintaining stitch stability and adapting to sutures of different thicknesses. Then the types are classified and explained in terms of offset direction and applicable machine models. Finally, the use of the compensation foot is explained in detail. Includes precautions during installation, adjustment and sewing as well as key points for inspection and adjustment. This generation of ideas is to comprehensively intr
-
How To Wind A ...
The content was generated by first introducing the overall topic of winding a bobbin using an automatic bobbin winder. Then it was broken down into steps, starting from preparing the thread and bobbin, locating the winder, inserting the bobbin, threading it, selecting the winding mode, starting and stopping the winding process, and finally removing the bobbin. Each step was described in detail to provide clear instructions.


Leave your Message:
Top
JISHUN SEWING PARS GROUP ALL RIGHTS RESERVED.
